Breakout pullbacks
This lesson will cover the following
- General thoughts on pullbacks
- What are false breakouts
- What is a failed failure
- What to look out for when placing protective stops
Every time the market breaks out through a certain resistance or support level, there will sooner or later be a pullback. If the price returns to within a few pips of the entry point and tests it, this is called a breakout test. The test can occur as soon as the next bar after the breakout, more than 10 bars later, or there can even be several tests of that level.
Breakout tests are important because, when the test is successful and the trend resumes, they provide traders with a relatively reliable entry signal (a breakout pullback is confirmed).
Basically, when the price breaks out of a trading range but fails to retain its momentum and later re-enters the trading range, it’s called a false breakout (failed breakout, or fake-out). If, however, there is a pullback to the breakout (the price stalls around the breakout point instead of re-entering the trading range) and the breakout-level test is successful (the price rebounds and resumes the trend instead of re-entering the trading range), the failed breakout is said to have failed – in other words, it is a Failed Failure, or it has become successful. Some traders also refer to this scenario as a cup and handle pattern. Here is an example.
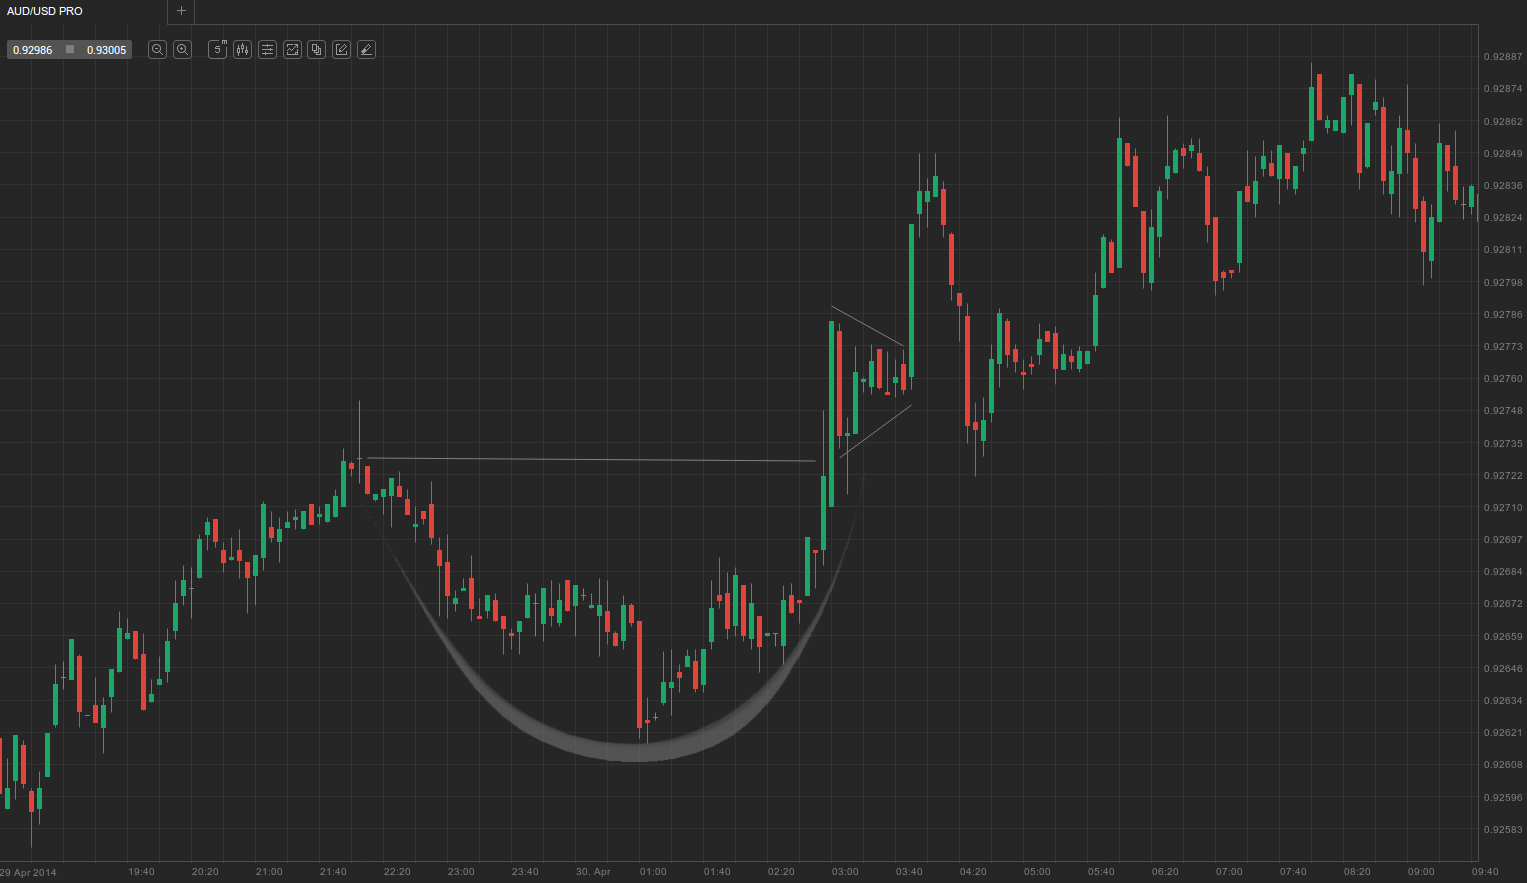
In the screenshot above, you can see a typical cup and handle pattern. The price earlier broke out to a new session high, after which a parabolic pullback followed. The pullback ended with a breakout to a new session high, which itself pulled back in the next two bars, giving a second entry signal and forming the so-called handle. The handle was an expanding triangle which, as expected on a strong trend day, broke out in the with-trend direction. Later, it pulled back to test the cup’s breakout level once again and then continued higher.
- Trade Forex
- Trade Crypto
- Trade Stocks
- Regulation: NFA
- Leverage: Day Margin
- Min Deposit: $100
Improved chance of success
 The trading value of these market moves comes from the fact that they are second-entry signals at the pullback test, and second entries have a higher probability of producing profitable trades.
Sometimes you don’t need an actual breakout for a breakout-pullback signal to be triggered. For example, if the market reaches a previous extreme but does not break it (doesn’t penetrate the support or resistance level of that extreme), the price will often pull back just as if there had been an actual breakout, and it should be traded in the same way.
Usually, if there has previously been a strong trend which then entered a trading range, a with-trend breakout from that trading range has a better chance of being successful than a counter-trend one. Conversely, if most of the trading session has seen two-sided trading, a counter-trend breakout from the trading range is more likely to occur.
Careful with tight stops
 Often, the price pulls back to the exact breakout point, so traders who entered on the breakout might have their stops hit if those stops are not well placed. As the breakout occurs, many traders enter positions in the breakout’s direction and, after the initial run, take partial profits and leave the remainder on the market protected by a stop-loss.
Let’s say we have an upward breakout. Typically, because the breakout point creates a support level for when the market pulls back, a trader would want to place their protective stop beneath that support level so that it does not get hit by the test itself. The stop’s goal is to protect the remaining portion of the trader’s position if the test fails and the price re-enters the trading range. Some market participants place break-even stops, but risking a bit more (widening the stop) can often yield better results because it lowers the chance of the breakout test – or some random noise – hitting the stop before the price edges higher.
It is often seen that the breakout test extends 5-10 pips beyond the breakout point, triggering many break-even and tight stops along the way, before it finally forms a breakout pullback. In some cases, therefore, risking a bit more with a wider stop can come in handy.
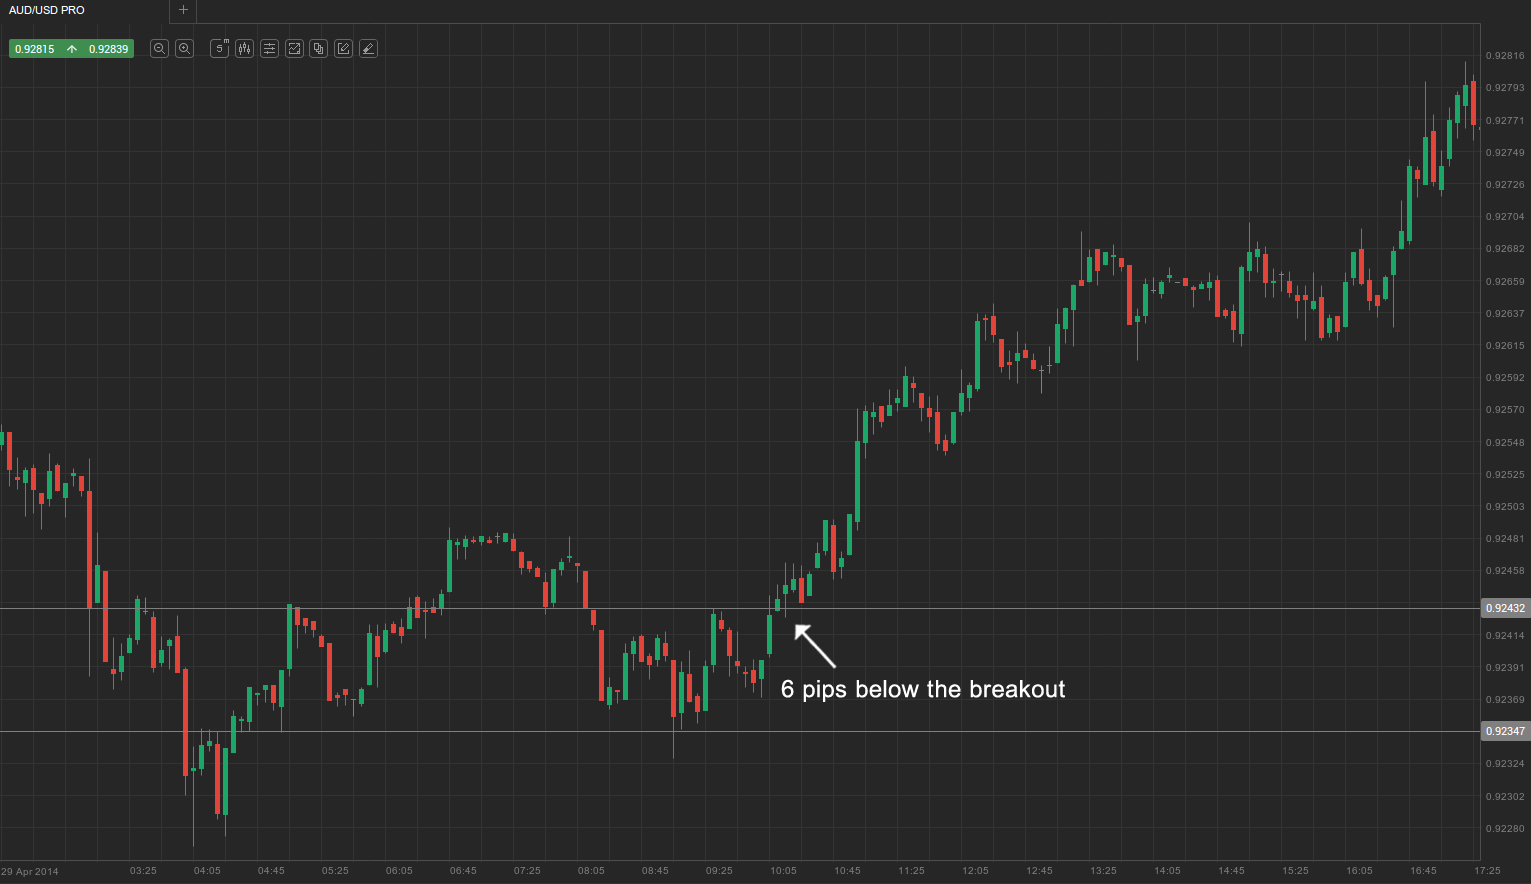
As shown in the screenshot above, the market entered a trading range as part of a pullback from a previous rally. After it broke through the top of the range, traders would expect the previous uptrend to continue and would likely go long above the high of the first bar that closes above the trading range. However, the market pulled back and tested the breakout level, and because the pullback extended several pips beyond that level, traders who had placed a protective stop exactly at the breakout point would have been stopped out at a loss.