How to avoid one of the biggest wallet drainers
This lesson will cover the following
- What is “barbed wire”
- Why must you avoid it
- What can you do, if you ultimately decide to risk your money
In the previous articles we talked about trading ranges, how you must position yourself and what to avoid. This article will discuss the worst kind of them all – the “barbed wire” type of ranges. In fact, this scenario is so tricky, that it is considered as one of the biggest money sinks in trading, thus we strongly advise you to avoid placing any orders at all costs when the market is in this condition.
 The “Barbed Wire” pattern is basically a trading range that takes place near the moving average and consists of three or more bars that mostly overlap each other and one of them is a doji. As you know, dojis are single-bar trading ranges which indicate that bulls and bears are in equilibrium – as one of the sides pushes the price away from its open, the other reverses that move through the close. Apart from the doji, when you look at the whole trading range, the largely overlapping two-sided trend bars reflect the same fact – bulls and bears are equally matched.
Moreover, because the price action is close to the moving average, in most cases matching it, this makes the task of guessing where the market will head next nearly impossible. Most experienced traders avoid this type of market equilibrium at all costs, with probably only a few being able to actually profit from it consistently. Logically, this leaves inexperienced traders with close to zero percent chance of ending with a profit, apart from being lucky once or twice.
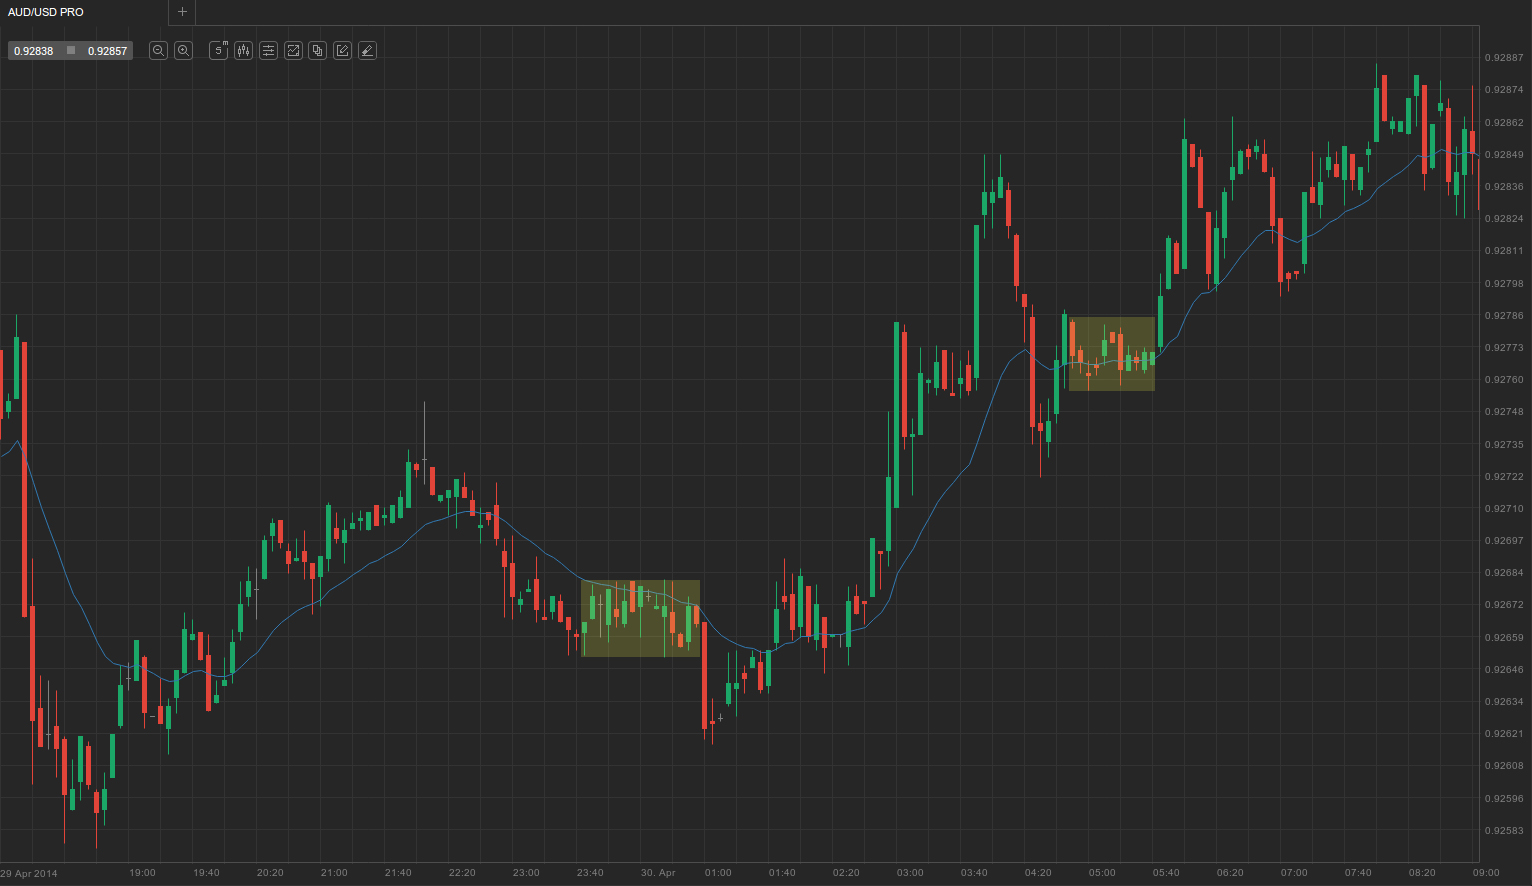
On the screenshot above you can see examples of the barbed wire pattern. The first pattern ended with a sell climax which broke out of the trading range. The prices downward momentum ended with an almost-doji bar, which failed to break through the most recent swing low from around 6 hours earlier. The market pulled back to test the breakout point and repeatedly retested it for five times, which led many traders to believe this is a good second short entry that usually has a higher chance of success. However, selling pressure was not enough and the market reentered the trading range, only to break out up later. This is just another proof of how tricky this pattern is.
The second barbed wire on the screenshot did not have a perfect doji bar, but as we know, close to perfect should be traded as perfect, and there were two bars closely resembling a doji. There was a with-trend breakout which continued the days trend.
If you ultimately decide to risk it…

However, if you feel eager to trade barbed wire avoiding all warnings, there are a couple of rules you can follow to improve your chance of success.
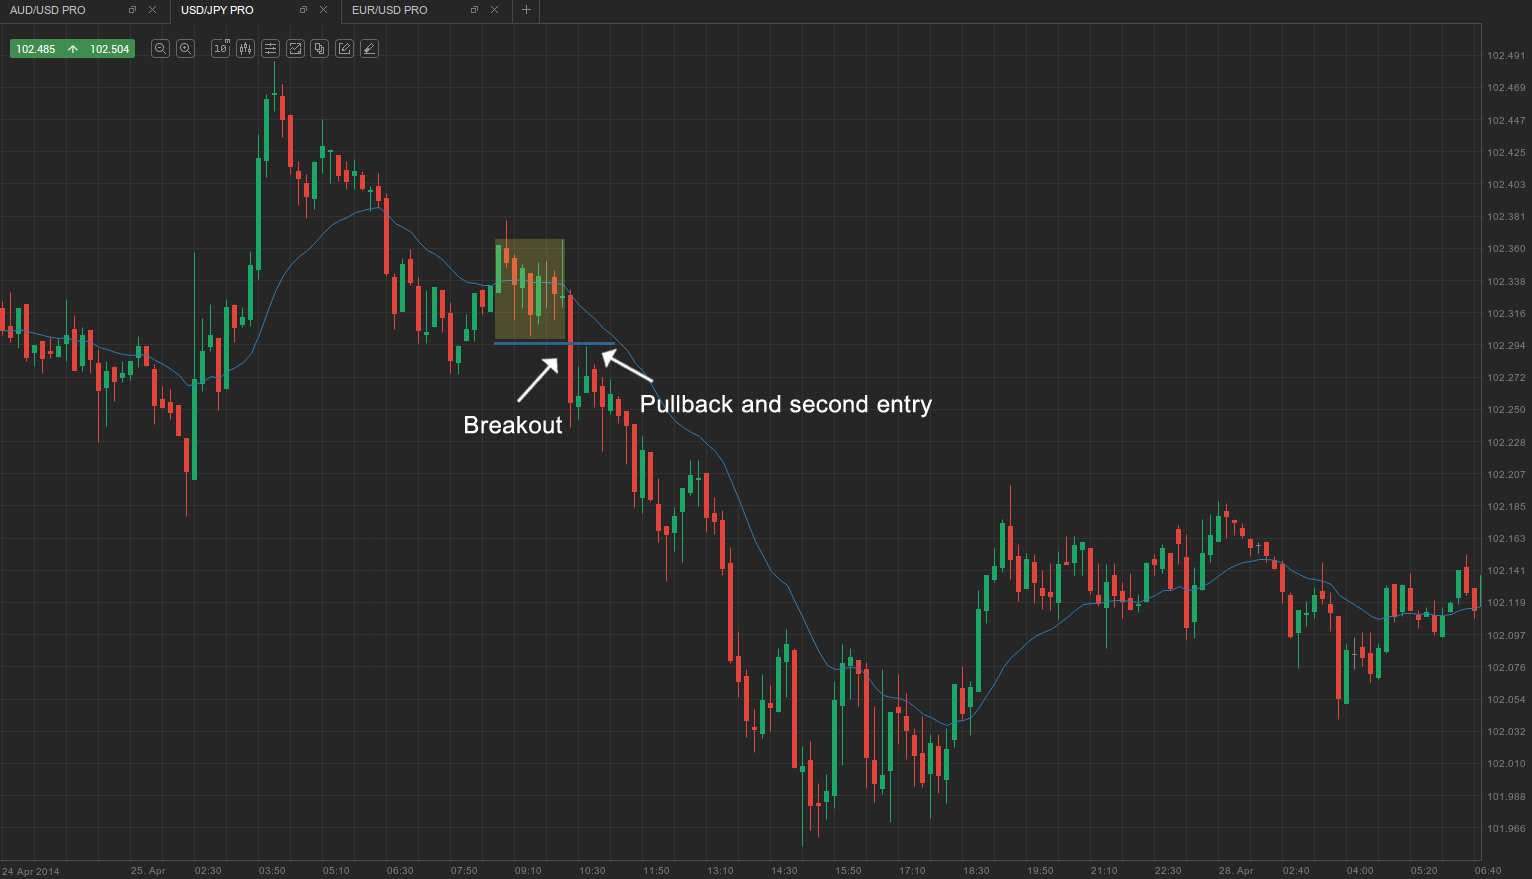
A common way to trade all trading ranges is to wait for a bar to break out with a trend bar and enter in that direction. However, this is a low-probability trade and naturally has a low success ratio. Because control over the market has been so evenly distributed up to that breakout, it is more likely for it to fail. What you can do is bet against that breakout trend bar after it closes. For example, in a bull trend, if a bar closes higher outside of the trading range, you can go short below its low, and vice versa.
In some cases, however, even this breakout failure will fail (it becomes a breakout pullback) and your short entry would be at loss. When this happens, you can buy above that bars high, because it is far less likely for a second entry to fail. After the market moves away from the “barbed wire” area, it should start forming trending bars, thus either bulls or bears have regained control. You can see a similar scenario pictured on the screenshot below, but in a bearish trend.
Alternatively, you can place orders within the trading range and aim for scalps. You can counter-trend bet small bars at the boundaries of the “barbed wire” pattern. If there is a small bar at the bottom of the range, you can scalp a long position entering above the high of that bar. A general rule of thumb is that you shouldnt buy when the barbed wire is mostly below the moving average, and logically dont sell if it is mostly above the MA. If you dont feel certain about taking those low-probability trades, you will be better off standing on the sidelines and waiting for a better and more reasonable setup to develop.
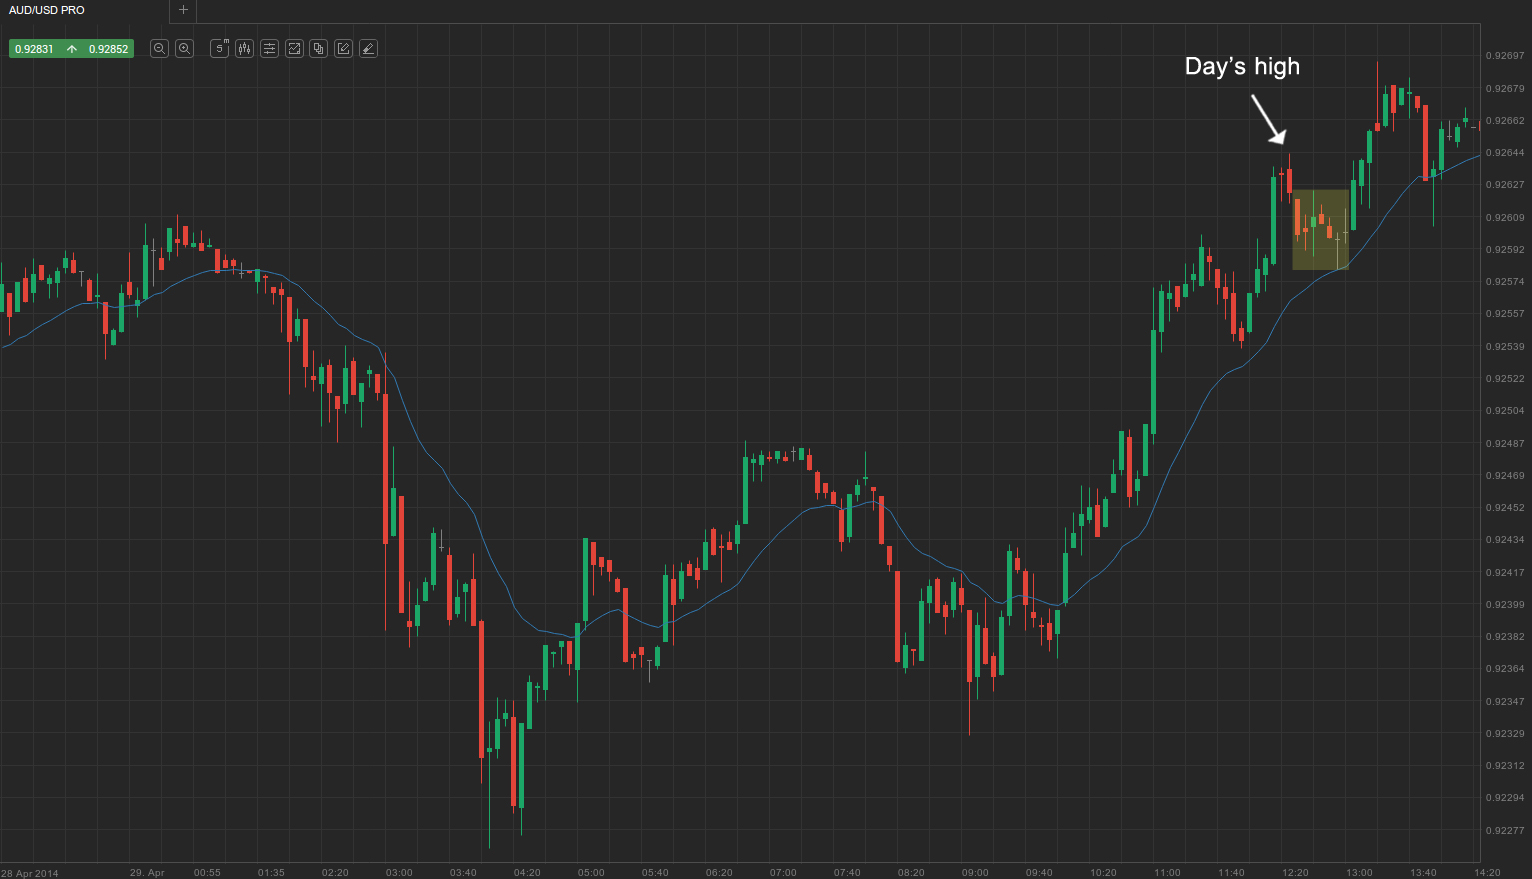
Session extremes

The “barbed wire” pattern also occasionally occurs after a breakout which has led to a session high or low, providing the trader usually with with-trend setups. The previous advice for positioning count here as well and if the second entry (breakout pullback) fails, you must best wait for additional market information.
Usually, tight trading ranges forming at the sessions extreme are continuation patterns, meaning you should have a with-trend entry in mind, which commonly comes after a failed breakout. A similar scenario is pictured on the following screenshot.